Though not must excitment has been happening here on the blog, things have definetley been busy in the shop.
These are some spacers for Rochester 2G carburetors. I like the quick and easy projects....
Friday, August 22, 2014
The power of steam....
Took a little time off last weekend and was able to make it to the Dover power show. Steam power is absolutely fascinating....
Thursday, August 7, 2014
Sealing the deal on a 235.......
Since the '50 Chevy is done and gone, onto the next project...
I had a guy drop off a '56 Chevy Fleetside that had a tremendous oil leak out of the rear of the engine. The engine was supposedly rebuilt and didn't have much actual run time on it. It only leaked while it was running and the oil appeared to be dripping off of the main bearing cap. Since the engine had been apart before, I suspected that the rear main seal was the culprit. The Chevy 235 family of engines use a two piece rope seal for the rear main. The aftermarket does supply a neoprene replacement but results seem to be mixed on the longevity and effectiveness of it. So, I ordered a replacement rope seal and a pan gasket from Patrick's who sell Best Gaskets...might be little ostentatious in their name, but the are actually surprisingly good quality and I highly recommend them.
So as you can see in the above picture, there was quite the oil leak. In order to change a rear main seal in a 235, the crank main caps have to be loosened and the rear of the crank lowered about an 1". The front is held in place by the cam gear and the front seal so you need to take care not to damage those. In order to drop the crank, the transmission, clutch and flywheel all have to come out. What's nice about the 235 is that the rear engine mounts are on the bellhousing so there is no need to have to support the engine.
Once the rear main cap is off, you can get your first glimpse of the seal. Once it was apart, there really didn't look anything noticeably wrong...at least wrong enough to allow that much oil to leak out. By design, the rear seal doesn't have hardly any pressure on it. You might notice the large cavity between the main bearing and the seal. This is an oil drain to allow the oil to drain back to the pan and not come in contact with the seal. This cavity extends down into the main cap and there is a large hole to allow it to flow back to the pan.
So, since I had it this far apart, I installed the new seal and trimmed it to length per the instructions. The mains were torqued down to spec and pan put back on. A little advice when it comes to pan gaskets on 235's, glue the gaskets to block and not to the pan. It makes it go a heck of a lot easier...
After everything was buttoned back up, I took it out for a test drive....and....it made absolutely no difference! It still was an oil leaking pig. Since everything was cleaned prior to being put back together, it was quite easy o spot exactly where the oil was coming from. It wasn't from the seal, it was running down the back of the block onto the seal area. The only place where it could be leaking on the back of the block was from could be the freeze plug for the camshaft bore. So...once again...apart it came....but this time, the bellhousing had to come off.
Once the bellhousing was off, you could see about a 1-1/2" long crack in the freeze plug where it appeared that a previous owner had pried there for what I assume was to remove a previous bellhousing. Luckily Napa had one in stock and after a few more hours of putting it all back together, out for another test drive. This time, however, it was dry as a bone!
So, in the end, a 99 cent part caused about 10 hours worth of work...
I had a guy drop off a '56 Chevy Fleetside that had a tremendous oil leak out of the rear of the engine. The engine was supposedly rebuilt and didn't have much actual run time on it. It only leaked while it was running and the oil appeared to be dripping off of the main bearing cap. Since the engine had been apart before, I suspected that the rear main seal was the culprit. The Chevy 235 family of engines use a two piece rope seal for the rear main. The aftermarket does supply a neoprene replacement but results seem to be mixed on the longevity and effectiveness of it. So, I ordered a replacement rope seal and a pan gasket from Patrick's who sell Best Gaskets...might be little ostentatious in their name, but the are actually surprisingly good quality and I highly recommend them.
So as you can see in the above picture, there was quite the oil leak. In order to change a rear main seal in a 235, the crank main caps have to be loosened and the rear of the crank lowered about an 1". The front is held in place by the cam gear and the front seal so you need to take care not to damage those. In order to drop the crank, the transmission, clutch and flywheel all have to come out. What's nice about the 235 is that the rear engine mounts are on the bellhousing so there is no need to have to support the engine.
Once the rear main cap is off, you can get your first glimpse of the seal. Once it was apart, there really didn't look anything noticeably wrong...at least wrong enough to allow that much oil to leak out. By design, the rear seal doesn't have hardly any pressure on it. You might notice the large cavity between the main bearing and the seal. This is an oil drain to allow the oil to drain back to the pan and not come in contact with the seal. This cavity extends down into the main cap and there is a large hole to allow it to flow back to the pan.
After everything was buttoned back up, I took it out for a test drive....and....it made absolutely no difference! It still was an oil leaking pig. Since everything was cleaned prior to being put back together, it was quite easy o spot exactly where the oil was coming from. It wasn't from the seal, it was running down the back of the block onto the seal area. The only place where it could be leaking on the back of the block was from could be the freeze plug for the camshaft bore. So...once again...apart it came....but this time, the bellhousing had to come off.
Once the bellhousing was off, you could see about a 1-1/2" long crack in the freeze plug where it appeared that a previous owner had pried there for what I assume was to remove a previous bellhousing. Luckily Napa had one in stock and after a few more hours of putting it all back together, out for another test drive. This time, however, it was dry as a bone!
So, in the end, a 99 cent part caused about 10 hours worth of work...
Wednesday, July 30, 2014
Thursday, July 17, 2014
It Runs!!!.....Again......
We were finally able to pour gas back into the truck and start it up for the first time since moving the gas tank and beginning the rewire. I am happy to say that it started right up without issue.
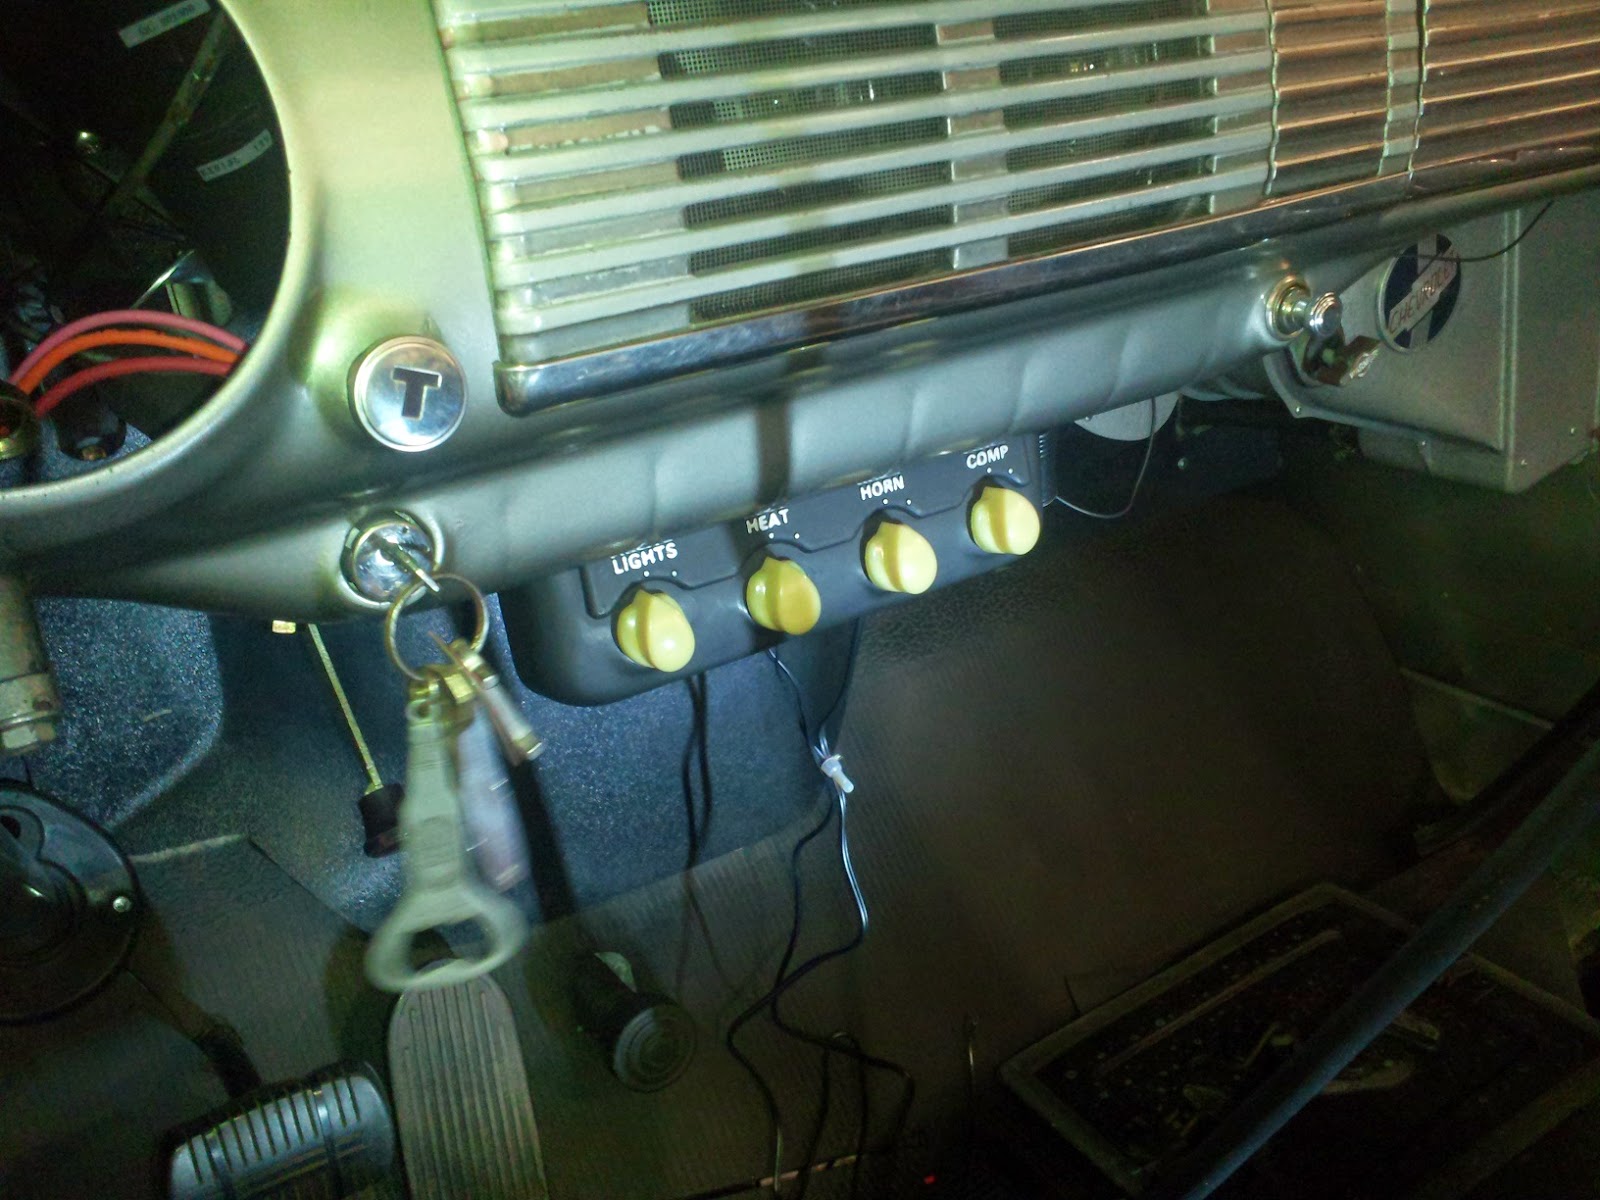
There are still several minor items that needed to be finished up before its done. One of those was the switch panel. I just couldn't bring myself to drill and mount these four switches in the original dash board, there really was no good place for them that didn't look like an afterthought. So, I figured our best bet was to build a panel that bolted underneath. I started with a flat piece of 20ga and formed the knob reliefs by bolting a socket to the back side and hammering around it on the front. After a bit of dolly work, I welded sides on to give it a bit more rigidity and also hide the wires.
I used the 3D printer to make a label panel that I epoxied on the front....
...then gave it a coat of paint and highlighted the lettering....
...then installed it.
You might be wondering what the switches do? The first two, "LIGHT" and "HEAT" are exactly what you might think...fog lights and the heater blower motor. The next two are for the the air horn that the customer had us install...which I might add is VERY loud! I wired the horns so that you can switch between the stock one and the air horn but use the same stock horn button on the steering wheel. The "COMP" switch is to turn on the air compressor.
There are still several minor items that needed to be finished up before its done. One of those was the switch panel. I just couldn't bring myself to drill and mount these four switches in the original dash board, there really was no good place for them that didn't look like an afterthought. So, I figured our best bet was to build a panel that bolted underneath. I started with a flat piece of 20ga and formed the knob reliefs by bolting a socket to the back side and hammering around it on the front. After a bit of dolly work, I welded sides on to give it a bit more rigidity and also hide the wires.
I used the 3D printer to make a label panel that I epoxied on the front....
...then gave it a coat of paint and highlighted the lettering....
...then installed it.
You might be wondering what the switches do? The first two, "LIGHT" and "HEAT" are exactly what you might think...fog lights and the heater blower motor. The next two are for the the air horn that the customer had us install...which I might add is VERY loud! I wired the horns so that you can switch between the stock one and the air horn but use the same stock horn button on the steering wheel. The "COMP" switch is to turn on the air compressor.
Thursday, July 10, 2014
Getting closer...
I'm not trying to complain, but the wiring on this truck has fought me the entire way. It's not really anybody's fault in particular, its just one thing after another.
This time, it was the turn signal switch. I couldn't figure out why the brake lights were not functioning reliably. They would work fine and then mysteriously stop working. I would check for power and then they would start working again. Finally, after a bit of diagnosing, it "turned" out that the turn signal switch was the culprit. Since the turn signals lights and the brake lights use the same bulbs, the brake light circuit runs through the turn signal switch and is interrupted by the appropriate turn signal when actuated. So, I installed a new switch only to find out that the turn signal indicators would not function correctly. This was because the aftermarket switches need a 3 prong flasher instead of the standard 2 prong flasher. The 3rd prong is there strictly for the indicators. Fortunately, the fuse panel had provisions in the flasher socket for the 3rd prong so after a bit of disassemble and running an extra wire, voila, it worked correctly.
As it stands now, the radio, heater, horn and dome light still have to be hooked up and then everything reassembled. All of the other wiring is done and ready to go.
This time, it was the turn signal switch. I couldn't figure out why the brake lights were not functioning reliably. They would work fine and then mysteriously stop working. I would check for power and then they would start working again. Finally, after a bit of diagnosing, it "turned" out that the turn signal switch was the culprit. Since the turn signals lights and the brake lights use the same bulbs, the brake light circuit runs through the turn signal switch and is interrupted by the appropriate turn signal when actuated. So, I installed a new switch only to find out that the turn signal indicators would not function correctly. This was because the aftermarket switches need a 3 prong flasher instead of the standard 2 prong flasher. The 3rd prong is there strictly for the indicators. Fortunately, the fuse panel had provisions in the flasher socket for the 3rd prong so after a bit of disassemble and running an extra wire, voila, it worked correctly.
As it stands now, the radio, heater, horn and dome light still have to be hooked up and then everything reassembled. All of the other wiring is done and ready to go.
Monday, June 30, 2014
New project for my father...
Since my dad is getting ready to retire for the 4th time, he needed a new project to occupy his time...
Subscribe to:
Posts (Atom)