Thursday, June 30, 2016

Ohio state truck update...

Wow, it's been a while....an unplanned trip to North Ireland followed by some time in Chicago really put things behind.

Here is an update on some of the things that have been done...


I managed to get the turn signals working.  The turn signal switch itself was an aftermarket Signal Stat model 900 that was in actually very good condition. This is a 7 wire unit that is designed to use the same element for the turn signal as the brake light.  These work well, are reliable and are easy to wire.  The one thing to remember is that these units need a 3 prong flasher for them to operate correctly.  The third prong on the flasher is designed for the indicator lights that are built into the Signal Stat.  Usually, this the blue wire.


When I wire these aftermarket switches up, I generally like to use the standard GM column plugs.  These can be found at Jegs relatively inexpensively.   I like to do this for several reasons, first, since all of the wires in the harness are GM colors, it's easy to get a diagram for diagnosis later down the road.  Secondly, if the owner ever wanted to put a late model tilt column in, the wiring would just plug in.


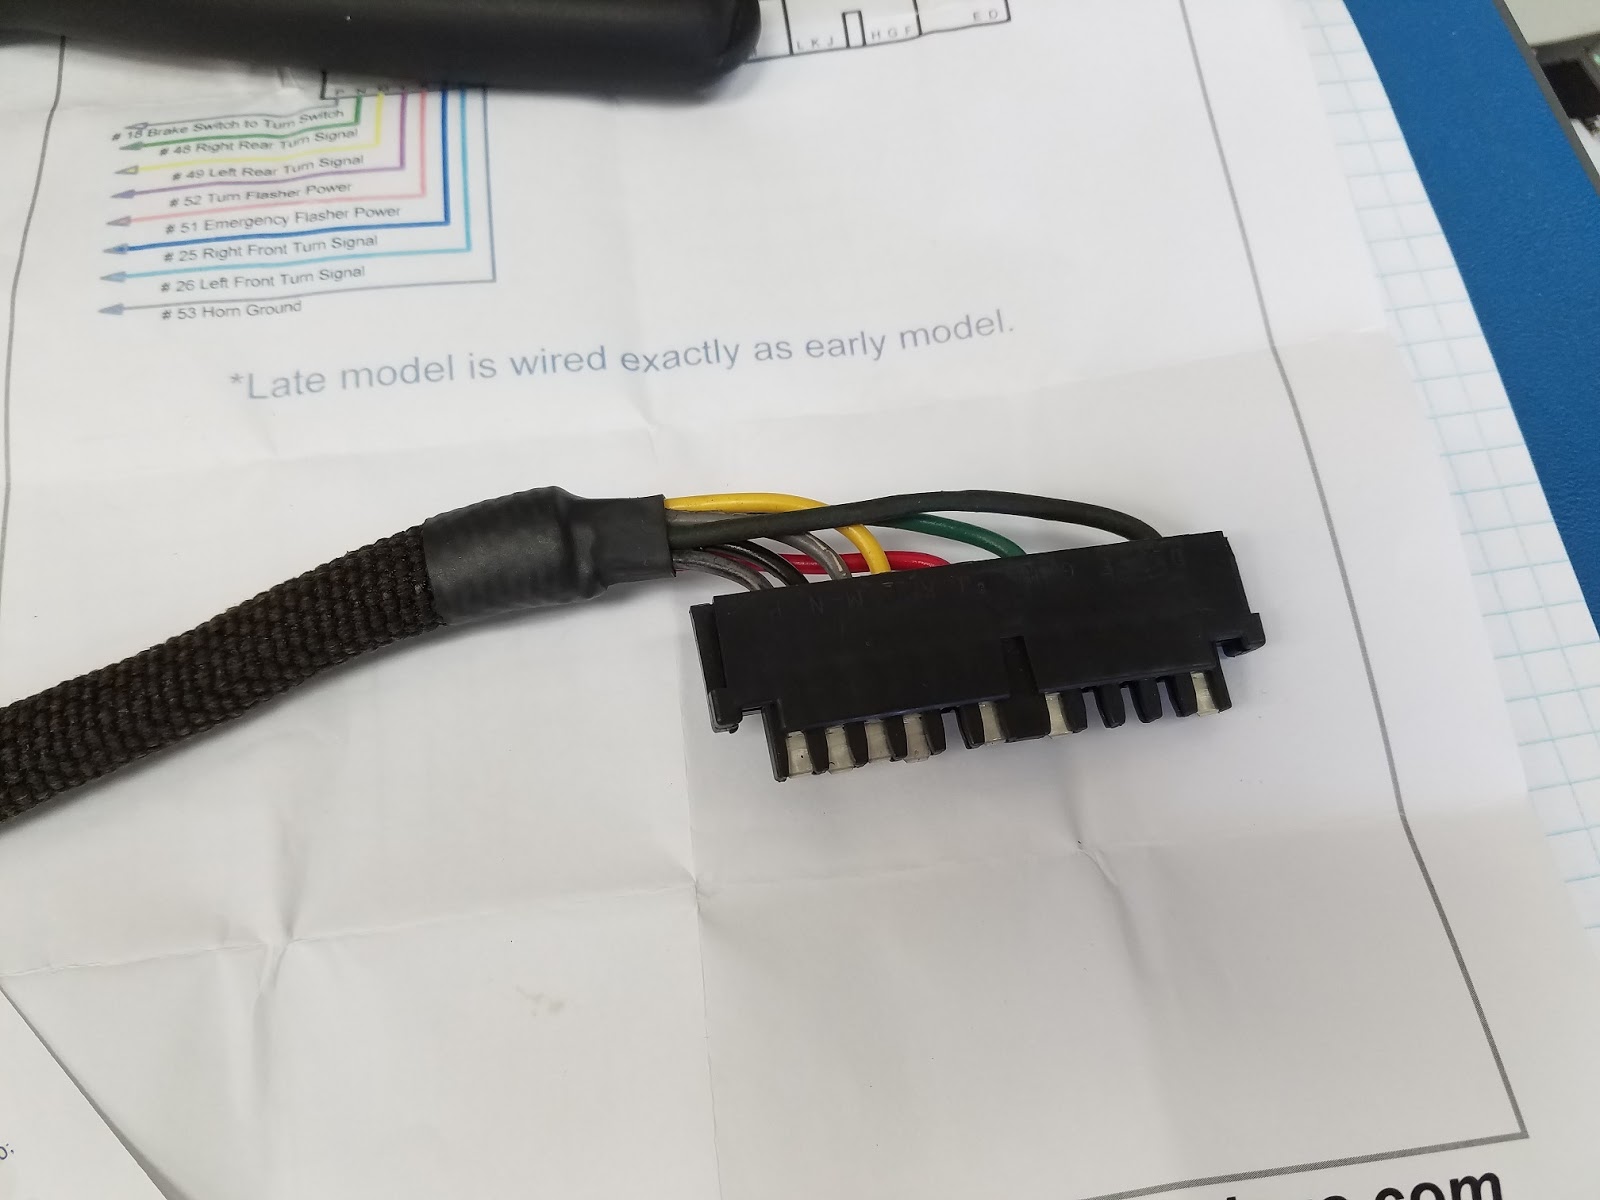
The Signal Stat only uses one flasher for both the turn signals and the hazards.  Most aftermarket harnesses have separate flashers for each, so on the harness side of the plug, there are going to be extra wires.  I just wire them in like there are for a later model column and leave them at that.


It's always a good feeling when stuff works...


Another accomplishment was the horn.  This vintage GM truck has an unique upper bearing that incorporated the horn circuit into it.  The bearing is mounted in rubber and has a wire connect to it that rus through the column and exits about 1/2 way down.  On the top of the bearing, there is a spring loaded contact in the steering wheel that rides on the bearing lip.  When the horn button is pressed, a ground connection is made from the steering shaft which then closes the circuit of the horn relay.


And here is a video...


Also, we also cannot forget about the dome light.


Tuesday, June 21, 2016

We are back...

Had the spend the last week in North Ireland.  It was a great experience but I do have to say that I am glad to be back in the shop.

Please be patient, I have several updates in the works...

Sunday, June 12, 2016

Out of the shop for a bit...

Over the next week, I will be out of the shop.  Feel free to email with any questions.

Tuesday, May 31, 2016

Dodge 218 Truck to T5 conversion...


So , the Dodge 218/230 truck T5 conversions are actually relatively simple to do.  I normally do not make these parts but I might start if there is enough of an interest.

The truck bellhousings actually have enough material where they can be redrilled for the T5 bolt pattern.  What's nice is that because of their overall length, there isn't a need for any adapter or special made clutch disc.  However, there still are several issues that need to be addressed.

The register hole on the bellhousing is 4-3/4" diameter where as the register diameter on the T5 is 4-11/16".  A simple ring is needed that presses onto the register of the T5 to make if 4-3/4" diameter.


You can see that on the one side, there is a slight lip.  This lip fits into the chamfer on the bellhousing hole and prevents the ring from coming off.

The next issue is the pilot bearing.  To provide adequate support to the T5's input shaft, the pilot bearing has to stick out from the back of the crank a bit.


Another issue is that on some of the bolt patterns drilled into the stock truck bellhousing, the upper driver's side hole interferes withe the T5's hole.  So, the easiest way to address this is to take a bolt and thread it in until is tightens up. Then, cut it off, grind flush and stake it so that it can not back out.  Very carefully, drill and tap the new hole.


The last issue to address is to machine a collar to press into the original release bearing.  This reduces the ID so that the release bearing will properly ride on the T5's bearing retainer.


Dodge 218 supercharger mounting...

As I try to finish up some of the long term projects I have going on, I was able to devote sometime the the belt tensioner on the Graham Super Charger mounts.

The only belt I had was a little long so don't mind the zip tie...


Let there be lights....

Over the Holiday weekend, I was able to finish up at least the front half of the Ohio State truck...

It's always a good feeling when the lights work again....


Tuesday, May 24, 2016

Tidying up...

As I was finishing the connections up the hood, the fuel and vacuum lines kept catching my eye.  I just couldn't leave them alone...so....I ended up redoing them.

Before:


After:


I also had to address the temp and oil lines as well as the choke cable.  I don't quite know what to do with the speedo cable yet though...