On the list of things to do to the '53 was to swap the 8 lug 3/4 ton axles out with 1/2 ton 6 lug axles. The original wheels were a solid split rim design and the owner was having a difficult time finding an OEM style replacement. Combined with the fact that the truck rode terrible with the original springs, it made sense to swap everything out.
The front was relatively easy with the exception that the front shackles were froze. It took some heat, persuasion and time to get them to unfrozen. Luckily, between some spare parts that we had in inventory and the two front ends, the were enough good parts to put it all back together correctly.
The rear was a little more involved. The original mounted under the rear springs and the replacement that came from a '57 truck was setup to mount on top of the springs. The spring perches had to be removed and new ones placed in the correct location.
While everything was apart, we ended up taking a couple of the helper springs out of the leaf pack. This should make the truck ride a bit better...
I am so glad to be done lying on my back while working under the dash. For as large as these trucks are, there really isn't much room.
One of the last items that needed finished was the installation of the electric wipers. I purchased this kit from LMC and have used it before. A word of caution though...if you are thinking of getting one for yourself, don't have too high of expectations. While the wiper motor itself is good, it doesn't really fit. Each bracket had to be modified slightly and the switch doesn't really fit the hole in the dash. The switch interferes with the wiper motor and the supplied hardware is about a size too small. Also, the instructions are very poorly written.
Once you get past all of this and address the issues, it works great. Unfortunately, I didn't get a picture of it installed. It's pretty much up behind everything else and hard to see anyway.
In case you don't remember, here are some before and after shots...
On this truck rewire, the customer wanted to have a switch mounted for the heater. Since there really wasn't place in the dash for one, I decided to make up a switch mount that attached underneath.
I first started by bending a 90 degree flange and then hammered some shape over a piece of steel rod mounted in the vise.
I then used a socket as a form to hammer a relief around where each switch was going to go.
Initially, I focused on getting the rough shape then went back to planish and fine tune. This was followed up by grinding with a 2" air powered abrasive wheel and some hand filing.
The ends were welded on and ground down...
The panel fit fairly well and doesn't distract from the overall look of the interior.
With a little bit of paint and the wires hooked up, it's ready to use.
Wow, it's been a while....an unplanned trip to North Ireland followed by some time in Chicago really put things behind.
Here is an update on some of the things that have been done...
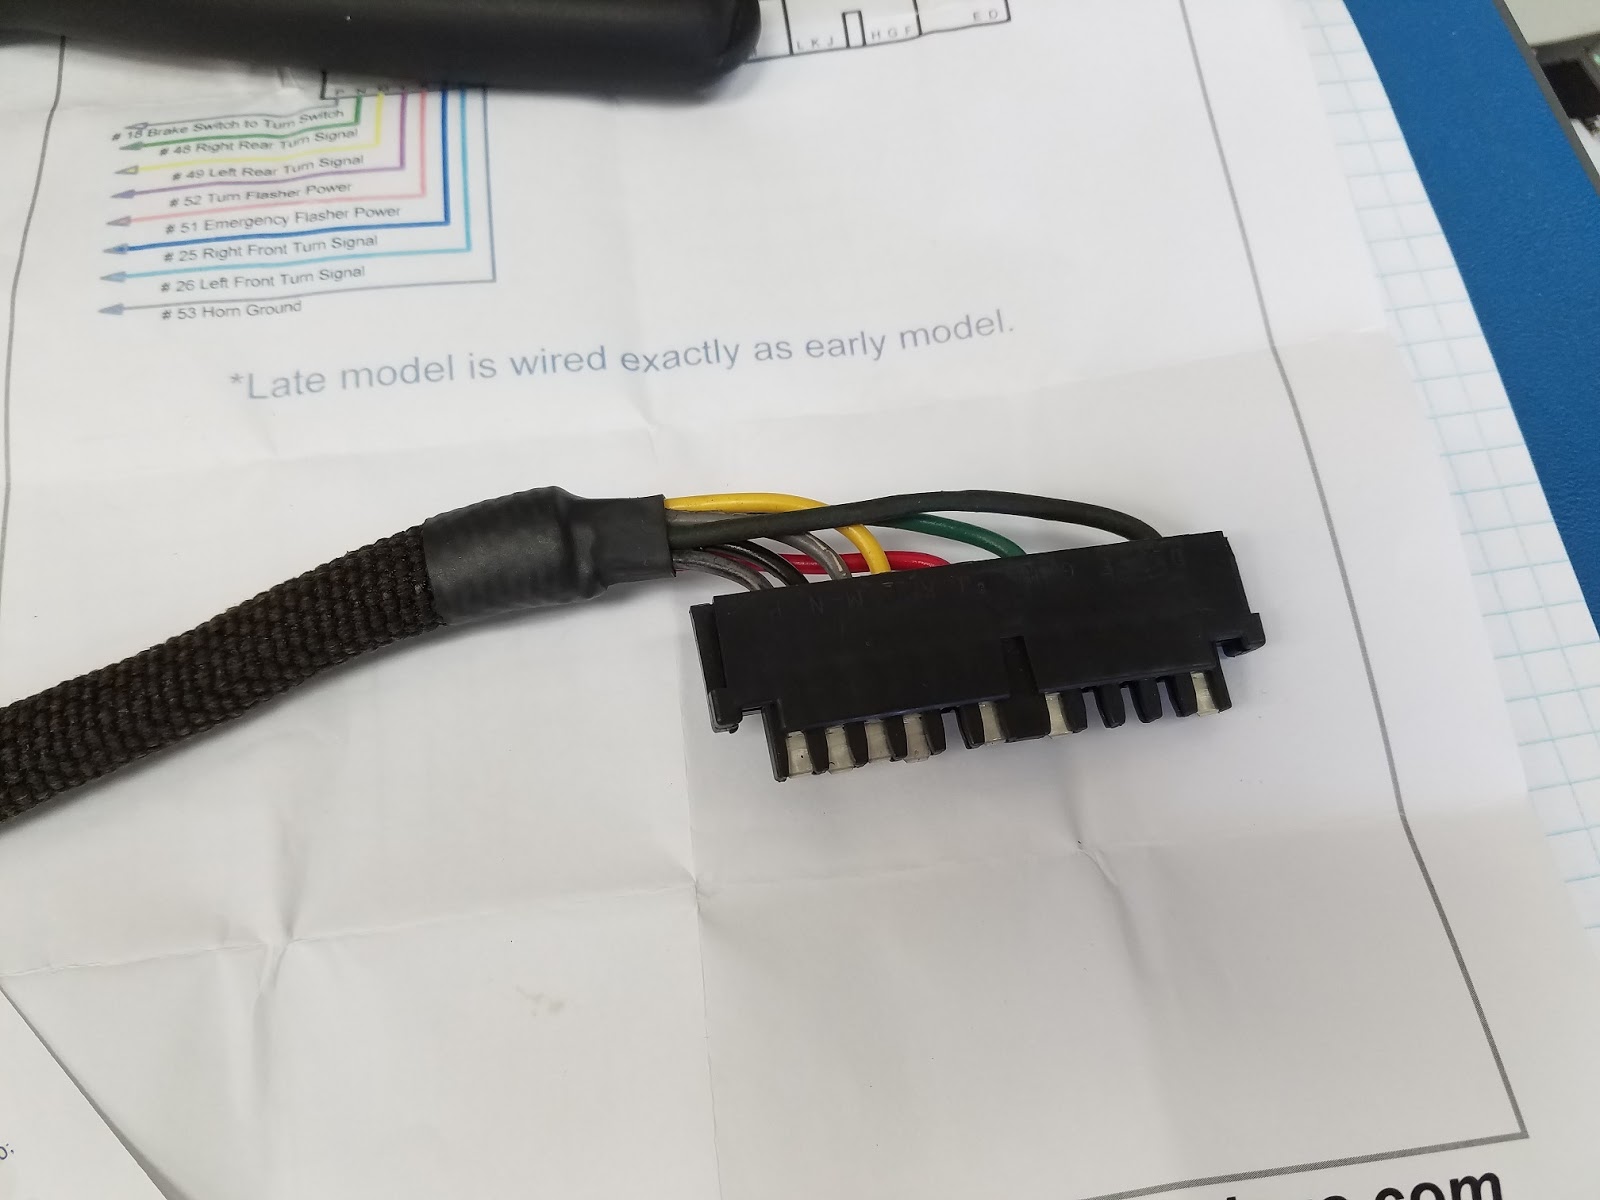
I managed to get the turn signals working. The turn signal switch itself was an aftermarket Signal Stat model 900 that was in actually very good condition. This is a 7 wire unit that is designed to use the same element for the turn signal as the brake light. These work well, are reliable and are easy to wire. The one thing to remember is that these units need a 3 prong flasher for them to operate correctly. The third prong on the flasher is designed for the indicator lights that are built into the Signal Stat. Usually, this the blue wire.
When I wire these aftermarket switches up, I generally like to use the standard GM column plugs. These can be found at Jegs relatively inexpensively. I like to do this for several reasons, first, since all of the wires in the harness are GM colors, it's easy to get a diagram for diagnosis later down the road. Secondly, if the owner ever wanted to put a late model tilt column in, the wiring would just plug in.
The Signal Stat only uses one flasher for both the turn signals and the hazards. Most aftermarket harnesses have separate flashers for each, so on the harness side of the plug, there are going to be extra wires. I just wire them in like there are for a later model column and leave them at that.
It's always a good feeling when stuff works...
Another accomplishment was the horn. This vintage GM truck has an unique upper bearing that incorporated the horn circuit into it. The bearing is mounted in rubber and has a wire connect to it that rus through the column and exits about 1/2 way down. On the top of the bearing, there is a spring loaded contact in the steering wheel that rides on the bearing lip. When the horn button is pressed, a ground connection is made from the steering shaft which then closes the circuit of the horn relay.
So , the Dodge 218/230 truck T5 conversions are actually relatively simple to do. I normally do not make these parts but I might start if there is enough of an interest.
The truck bellhousings actually have enough material where they can be redrilled for the T5 bolt pattern. What's nice is that because of their overall length, there isn't a need for any adapter or special made clutch disc. However, there still are several issues that need to be addressed.
The register hole on the bellhousing is 4-3/4" diameter where as the register diameter on the T5 is 4-11/16". A simple ring is needed that presses onto the register of the T5 to make if 4-3/4" diameter.
You can see that on the one side, there is a slight lip. This lip fits into the chamfer on the bellhousing hole and prevents the ring from coming off.
The next issue is the pilot bearing. To provide adequate support to the T5's input shaft, the pilot bearing has to stick out from the back of the crank a bit.
Another issue is that on some of the bolt patterns drilled into the stock truck bellhousing, the upper driver's side hole interferes withe the T5's hole. So, the easiest way to address this is to take a bolt and thread it in until is tightens up. Then, cut it off, grind flush and stake it so that it can not back out. Very carefully, drill and tap the new hole.
The last issue to address is to machine a collar to press into the original release bearing. This reduces the ID so that the release bearing will properly ride on the T5's bearing retainer.