Friday, December 9, 2016

'49 GMC update....

Quite a bit of progress has been made on the GMC recently, however, I did run into a small snag with  the front end.

Initially, the front end was tacked in place so that a fender could be hung to make sure that the front cross member was located correctly.  Fatman supplies tubes that slip over the shocks to simulate ride height without having to install the springs.  When the suspension was compressed to this simulated ride height, the lower a-arms were running up hill.  According to Fatman, the lower a-arm are suppose to be level to  +/- 2 degrees.

 After several phone calls and a ton of measurements,  it was determined that this truck has a 3/4 ton chassis.  The 3/4 ton chassis is about 1" taller than a 1/2 ton.  This caused the distance between the hat and cross member to be too great.

Once we figured this out, I trimmed the cross member and everything lined up perfectly.


I have to say that I was very impressed not only with Fatman's front end, but also with their customer service.  It's nice dealing with people that actually understand suspension geometry.

Wednesday, November 9, 2016

'49 GMC...

So recently, we pulled a '49 GMC in the shop to do some suspension work and add a spare tire mount over the driver's rear fender.  Like most of these trucks, this one has been well used.


The customer supplied a Fatman Fabrication front suspension.  We have used these in the past and I am always impressed by their design and quality.


The customer wants this truck to sit as close to original as possible, so Fatman supplied raised spindles.  Normally, these cross members lower the vehicle 2-3" and these spindle raise them back up near original ride height.


When doing suspension work, I prefer to start with the rear and get it sitting where it needs to be.


By the looks of these shackles, I don't believe they had seen grease in a very long time.


The more that I dug into removing the rear, it came apparent that the entire rear suspension was going to have to be replaced.


Once everything was removed on the rear, it was time to start dissembling the front...


It was much of the same.  Everything was completely worn out.


The front cross member was marked and laid out per the instructions.  Once the rear is completed, the truck will be re-leveled and we can start welding the front in.


Monday, September 26, 2016

Model A parking brake mount...

Since the shop is currently without a customer vehicle, I figured I would take this time to try and make some progress on the Model A truck.

With the Model A to T5 conversions that I have been doing, several people have asked for a parking brake handle mount.  Since I was planning to running one on my Model A, this worked out to be the perfect time to do something about it.

After several revisions out of cardboard, I was able to 3d-print something that looked like it would work.


This placed the handle further back and toward the passenger side about an 1-1/2". 


After several hours of programming and whittling, I have several that are almost complete.


I will probably make the next revision out of laser cut plate and weld it together...that seems a bit more efficient...

Monday, August 15, 2016

Rockabilly Ruckus...

I took the Roadster out to the Rockabilly Ruckus over the weekend.  This was the first year for the show and it's got some great potential.  It's definitely worth checking out.  One of the coolest activities was to take your car out on the track and slide it around a bit.

Check it out here:
The Rockabilly Ruckus


This picture was forwarded to me and I have no idea where it came from, so if you took it, please let me know.


And here are some videos of the track action....


Back in the shop...

I was finally able to take the Chevy truck out for a drive.  However, as I pulled in the driveway, the left front wheel cylinder started leaking....so back in the shop it goes.

The front end is out of a '51 1/2 ton truck which had the "Huck" style of brakes.  These used a 1-1/4" diameter wheel cylinder with integrated adjusters.  Since one was leaking, I figure the best bet was to replace both of them.  Believe it or not, the local Napa actually had them in stock.


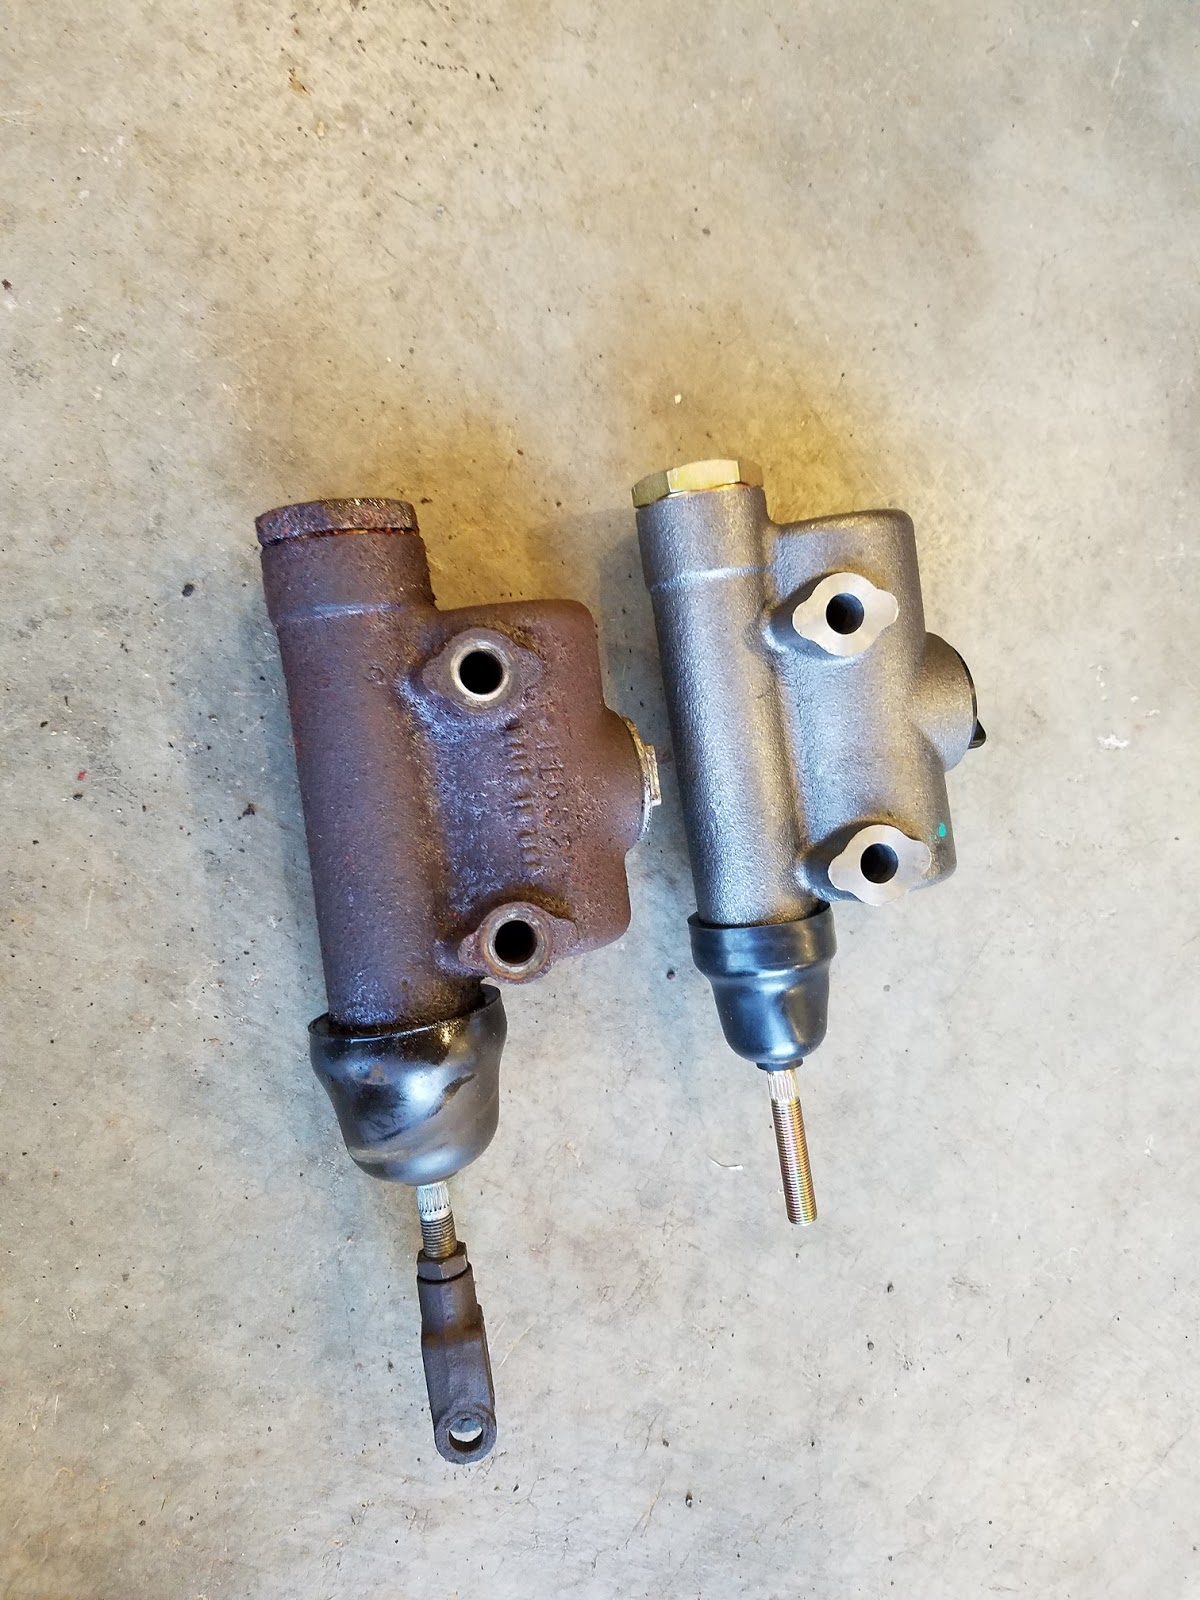
While investigating the differences in brakes between the years of the AD trucks, I realized that the truck had a larger ID master cylinder than it's 1/2 ton counterparts.  Also, the 3/4 and 1 ton version used Bendix style brakes with 1-1/8" diameter wheel cylinders.  Since the Bendix brakes are self energizing, the line pressure can be lower than the Huck style brakes.  So, what this all means is that the stock 3/4 master cylinder was too big for the 1/2 ton wheel cylinders which reduced the line pressure. This made the pedal feel harder than what it should have been.  Napa actually had the correct 1/2 ton master available which ended up being a direct bolt on.  Now the brakes work and feel great.


While checking the fluids before the first test drive, I noticed that the rear end was low.  As I added gear lube, it ran out as fast as I put it in.  The rear cover was leaking and when it was removed, only about 1/2 of the gasket was present.  After a bit of research, Autozone was able to order one in directly from Federal Mogul.


With the brakes fixed and leaks address, it's almost done now.  I am just waiting on dust caps for the front hubs.


Napa Part Numbers:

Master Cylinder: P29770
Wheel Cylinder: 3406

Autozone Part Number:

Rear end gasket: RDS-4304

Tuesday, August 2, 2016

So close....

Since my last post, we've managed to take care of some of the small details.

Once the pinion angle was set and the the spring perches were fully welded, we moved onto the shocks.  The lower mounts were salvaged off of the originally rearend and reused with the "new" '56 truck rear.


The parking brake was next.  Since the rear was from a '56, we had to use the '55-'59 style of cables which attach differently to the frame.  Since the original brackets were a forging, it was a relatively  easy modification...


Once the parking brake was address, we adjusted and bled the brakes.  There were a couple of small leaks that were addressed and the pedal felt very nice.  Pretty much what is left is to install a conversion u-joint, reinstall the driveshaft and take it for a ride....It's getting close.

Wednesday, July 27, 2016

'53 axle swap....

On the list of things to do to the '53 was to swap the 8 lug 3/4 ton axles out with 1/2 ton 6 lug axles.  The original wheels were a solid split rim design and the owner was having a difficult time finding an OEM style replacement.  Combined with the fact that the truck rode terrible with the original springs, it made sense to swap everything out.


The front was relatively easy with the exception that the front shackles were froze.  It took some heat, persuasion and time to get them to unfrozen.  Luckily, between some spare parts that we had in inventory and the two front ends, the were enough good parts to put it all back together correctly.


The rear was a little more involved.  The original mounted under the rear springs and the replacement that came from a '57 truck was setup to mount on top of the springs.  The spring perches had to be removed and new ones placed in the correct location.


While everything was apart, we ended up taking a couple of the helper springs out of the leaf pack.  This should make the truck ride a bit better...