Once everything was apart, cleaned and the flywheel was resurfaced, the next step was to put it all back together. First piece to install was the pilot bearing. It should just lightly tap in the back of the crank. Press it in until it is flush. Next is the flywheel. With a 235, you can only install the flywheel on one way. Torque the bolts down to the proper specs.
The clutch and pressure plate go on together. Make sure you have the correct alignment tool for the clutch disc. Slide both pieces up in and install the six pressure plate bolts making sure that you can still slide the install tool back and forth just a little bit. Torque the pressure plate bolts down per the specs as well as in an even pattern. Remove the install tool.
Place just a little bit of grease on the id of the throwout bearing and slide over the clutch fork.
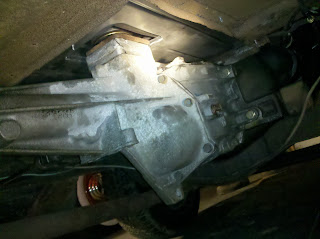
Install the adapter plate and now you are ready to install the trans. Below is a picture of everything except the trans installed. Sorry about the pic, but the light was shinning right at the camera.
Before the transmission can go in place, the four bolt holes on the transmission itself need to be drilled out to 1/2". They originally used a metric bolt just smaller that the 1/2" diameter. Once this is done, install the transmission. The short 2" long bolts go in the top two holes and the longer 3" bolts go in the bottom two holes. The bottom two holes on the bell housing are not tapped, so it is necessary to use lock washer and nuts on these bolts on the inside of the bell housing.
Everything should slip together, do not force anything.
Now what is left is to hook up the speedometer, adjust the clutch and install a drive shaft. I had to have a drive shaft made for this particular install due to the original truck having a two piece shaft. Most of the time, if the truck is a 1/2 ton, the original drive shaft can be shorten. Usually this is 2" to 3" depending on the vehicle. A conversion joint from NAPA can be uses to convert the original drive shaft to the S-10 standard GM 27 spline yoke that you hopefully got with you transmission. If not, these are extremely plentiful.
The shifter will probably require some bending to clear the seat. In an S10, the shifter leans back at roughly a 60 degree angle. In a 50's Chevy truck, it needs to be pointing straight up and down. Also, the floor pan might need to be clearanced for the revised shifter location. In this particular install, the original floor pan was to far gone, so a new one was made. I'll cover that in the next post.
Once everything is hooked up, take it out for a test drive. It should shift easily into all gears. Reverse on every T5 I ever had slightly grinds going into gear. If it will not go into reverse or has excessive grinding, adjust the clutch linkage.
Here is a time lapse video of the complete instal. It includes a modification of the shifter to add a spacer plate to reduce the throw. In the above picture, you can see the spacer on top of the shifter riser.
If you have any questions, feel free to email me. dfarwell09@gmail.com


