Thursday, January 30, 2014

Willy's progress...

It's been a slow go around here but we were able to make some progress on the Willy's Knight.  The front end is completely welded in and the boxing plates are coming along nicely. 

After we had everything mocked together and the cross member tacked in, we set the car on the ground to see what it was going to look like at ride height.  We immediately notice two issues.  First off, the front tires were not lined up in the fenders quite right.  They were back about an inch.  I wish I would have taken a picture...it looked like the car was tripping over itself.  Secondly, it was sitting too high.  We did have the correct diameter tires that we wished to use and the front suspension was sitting at the desired ride height but it still needed to come down about an 1-1/2" 

Since the cross member had to come out anyway, we decided to trim about a 1/2" off of the risers and move it up into the frame.  This placed the upper spring hat level with the top of the frame.  Any more trimming, we would have run into issues with the control arms interfering with the fenders.  As it is now, there is sufficient clearance.  Ultimately, we are going to have to probably adjust the remainder of the ride height with the springs by either using a shorter coil, cutting the supplied coils or using a 3" dropped spindle instead of the supplied 2".  Either way, an inch isn't that hard to make up.....


Wednesday, January 15, 2014

The Fatman Comes Through....

You might have noticed that there hasn't been much progress made on the '33 Willys Knight.  Well, while that's true, it's not our fault...entirely. 

You see, the original plan was to use the C4 Corvette front end and rear end.  And while the rear end installed remarkably easy the front end was going to fight us the entire way.  First off, the frame was about an 2" too wide for the cross member.  This alone is certainly not an insurmountable task but the bigger issue was the placement of the upper control arms.  The 'vette has a very tall spread between control arm and all of the measuring that we did indicated that at the desired ride height, the upper control arm mounts would need to be on the outside of the fender....or at least behind a very unsightly bulge.  While the customer was somewhat OK with having us cut up his fenders, we just couldn't do it.  It would have looked horrendous and I personally did not want my name associated with it.  I mean, come on, I have some sense of standards...albeit they are sometimes low, but still....

So, we started looking for an alternative.  I must have called every aftermarket hotrod front end manufacturer that I could find.  Overall, I have to say that I was very disappointed and a bit surprised.  It seemed that almost every company that I talked to really didn't grasp the concepts of suspension geometry nor did they employ a 3D CAD software that I could send them a  3D model of the frame/fenders that I had drawn up.  Several companies did use AutoCad....but come on....AutoCad isn't really CAD software...it's more like a complicated version of an ecth-a-sketch.  Out of college, I turned down job offers from several large companies on the sole basis that they used AutoCad.

There was one company however that really did want to help, and that was Fatman Fabrication.  They really did go far above my expectations, which to be honest, at the point that I called them were very low since having dealt with everyone else.  I was ultimately put in contact with the founder and owner, Brent, who seemed genuinely enthused with having a project slightly out of the norm.  After about 30 emails back and forth and several CAD files, he determined that one of his existing kits could be easily adapted to work with in our situation without...most importantly... modifications to the fenders.  Not only did he understand front end geometry and functionality, he knew what an .IGES file was and how to use it.

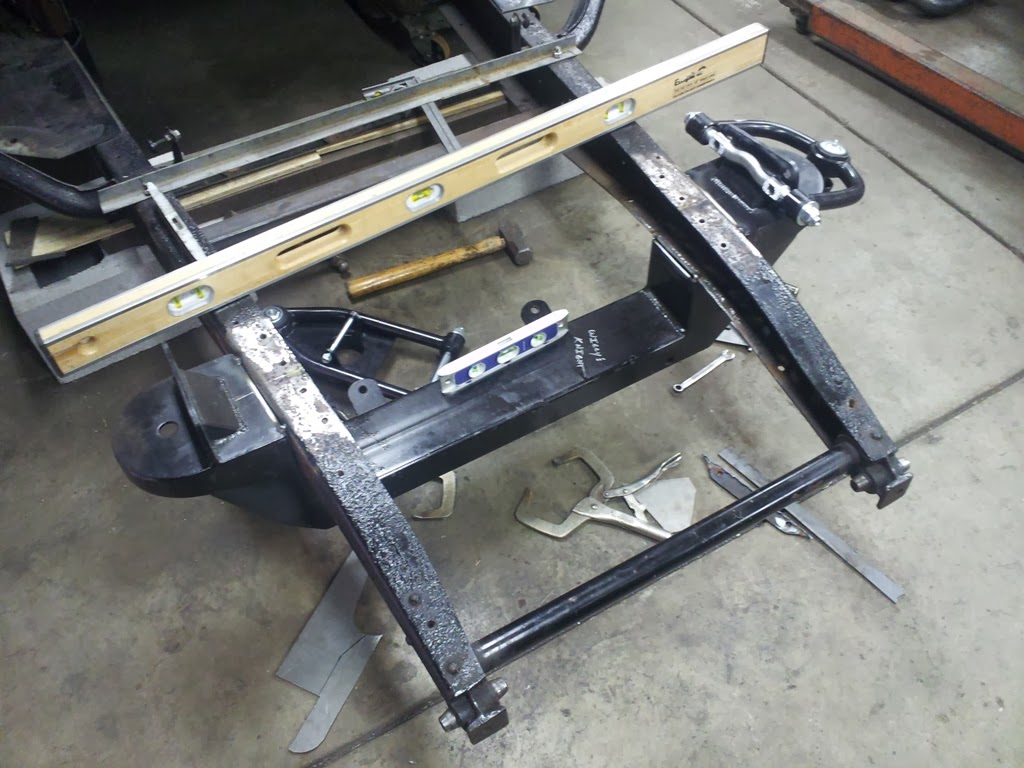
The front end finally showed up yesterday and to say the least, we were eager to install it. The cross member fit absolutely perfect.  No trimming, beating or gaps to fill....I truly mean absolutely perfect.  We did have a slight hiccup on receiving the incorrect lower control arms, but Fatman's customer serviced resolved the issue immediately.  You simply could not ask for anything more from a company.


There is nothing like a pile of new parts....
 

Wednesday, January 8, 2014

218 Supercharger Mount...

Amidst of everything else going on, I found some time to model several more components for the Graham supercharger install.  It's definitely going to be tight, but it looks like everything is going to it fit quite nicely and I should be able to use a single belt.

It not quite done yet, but we are getting closer.  I still have to place a pulley to drive the supercharger.  There will also be a flexible coupling between the supercharger and the green mount.  It's convenient that the supercharger itself will allow for some misalignment and fine adjustment by a height adjusting screw on the bottom.  Graham allowed a great deal of clearance in the bolt holes where the housing bolts to the mounting bracket which allows the supercharge to move about an 1/16" in all directions.


Friday, January 3, 2014

The Marvelous Marvel #1...

As tradition, we went the Kiko New Year's Eve Day consignment auction.  It was cold, snowy, windy and in the middle of a corn field.  To say the least, it was miserable but I stuck it out the entire day to come home with this...


It's a Marvel #1 draw power hacksaw.  Originally setup for a line shaft, along the way it was converted to electric with a fairly ornate v-belt pulley, jack shaft and a very old electric motor.  After cleaning the snow off of it and covering the important moving bits with a bit of lubrication, I plugged it in and surprisingly it worked!  The engagement clutch needs a bit of work and overall needs cleaned, but I think it has potential for the shop.  I can't wait to actually start using it!