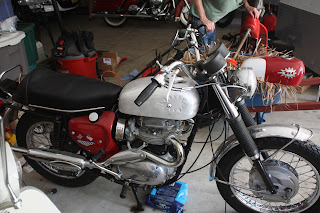
As promised...
Sort of makes me want to build my own bike...
Friday, June 29, 2012
Thursday, June 28, 2012
On to the next project...
I was able to finish up the tank last night for the BSA. I'll try and get several pictures when I fit it to the bike.
Hmmm, what should I work on next? Maybe it's time to start working on the 235 valve cover again...
Hmmm, what should I work on next? Maybe it's time to start working on the 235 valve cover again...
Thursday, June 21, 2012
email...
I received an email last night in response to the "Flaked" post yesterday.....
Dave,
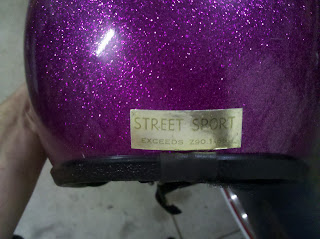
But now you're a dick with a purple helmet! I couldn't resist.
Dave,
But now you're a dick with a purple helmet! I couldn't resist.
She'll live (unless she trips and hits her head!) Sorry, again, I couldn't resist.
Awesome...thanks Todd. I like my purple helmet.
Yet, some more BSA progress...
Finally was able to finish up the filler neck. I probably have more work in just the neck than I do in he rest of the tank. I had to make a die to press the shape under the neck. It took a couple of tries and some fine tuning with a grinder, but it didn't turn out too bad. Originally, I tried to hammer the it out, but it turned into a mess....quickly.
Wednesday, June 20, 2012
flaked...
I stopped at a garage sale over the weekend and had to have this. The lady's 6 year old daughter was wearing it and I kinda felt bad when she made her take it off to sell to me. The poor little girl was on the verge of tears....I'm such a dick.
Monday, June 18, 2012
'50 buick more door...
A customer drop this beauty off at the shop over the weekend to have an engine installed. For as big as this car is, they sure didn't leave much room in the engine bay.
The customer wanted the standard 350/350 install as this is going to be his daily driver. We made some fairly straight forward engine mounts, had to notch out for the mechanical fuel pump and for the harmonic balancer, modify the original tranny cross member and cut a drive-shaft. Not too bad for a couple days worth of work.
The customer wanted the standard 350/350 install as this is going to be his daily driver. We made some fairly straight forward engine mounts, had to notch out for the mechanical fuel pump and for the harmonic balancer, modify the original tranny cross member and cut a drive-shaft. Not too bad for a couple days worth of work.
BSA progress...
I was having a very difficult time trying to find a filler neck for this BSA gas tank. Finally, I figured that I was just going to have to make one myself...
Thursday, June 14, 2012
The Cushman runs!!!
After having this thing sit around for several years, it was time to start using it again. The problem was that it would barely run do to some serious carburetor issues. Originally it had Keihin cab and unfortunately, I could not find anyone, anywhere that caries a rebuild kit for it. So, I managed to find a much more common Walbro carb off a 22hp truckster that with a few minor modifications fit perfectly.
Everything work really well.....until I ran out of gas.
Now that the thing will run, I feel a bit more inclined to fix some of the sheet metal issues. At the very least, get rid of that ugly green color.
Everything work really well.....until I ran out of gas.
Now that the thing will run, I feel a bit more inclined to fix some of the sheet metal issues. At the very least, get rid of that ugly green color.
New goodies...
I like when the Fed-Ex man shows up. Got this off of the HAMB. Every once in a while, you can find a fairly decent deal over there.
I don't know what I needed it for, but I couldn't pass it up.
I don't know what I needed it for, but I couldn't pass it up.
Wednesday, June 13, 2012
Monday, June 11, 2012
Indentations...
On original BSA tanks, there were indentations for the BSA stickers. From the onset, the customer wanted them and as we all know... the customer is always right.
I attempted several different ways of doing this...none of which were too successful. If I had known where to place them before I welded the two halves together, I would have used the joggle dies in the Pullmax. I eventually settled on cutting the overall shape out and then welding in a piece.
It will take quite a bit of finish work to make it look good, but I think it'll turn out ok. We will see...
new equipment...
Well, at least new to me. It was built in 1966. Anyway, it's a Pexto bar folder. Don't quite know how to use it to it's full capacity...but I'm sure I'll mess with it soon.
Friday, June 1, 2012
BMW progress
Finally finished up some minor details on the BMW project. Good thing the owner wasn't in too much of a hurry...
Subscribe to:
Comments (Atom)


