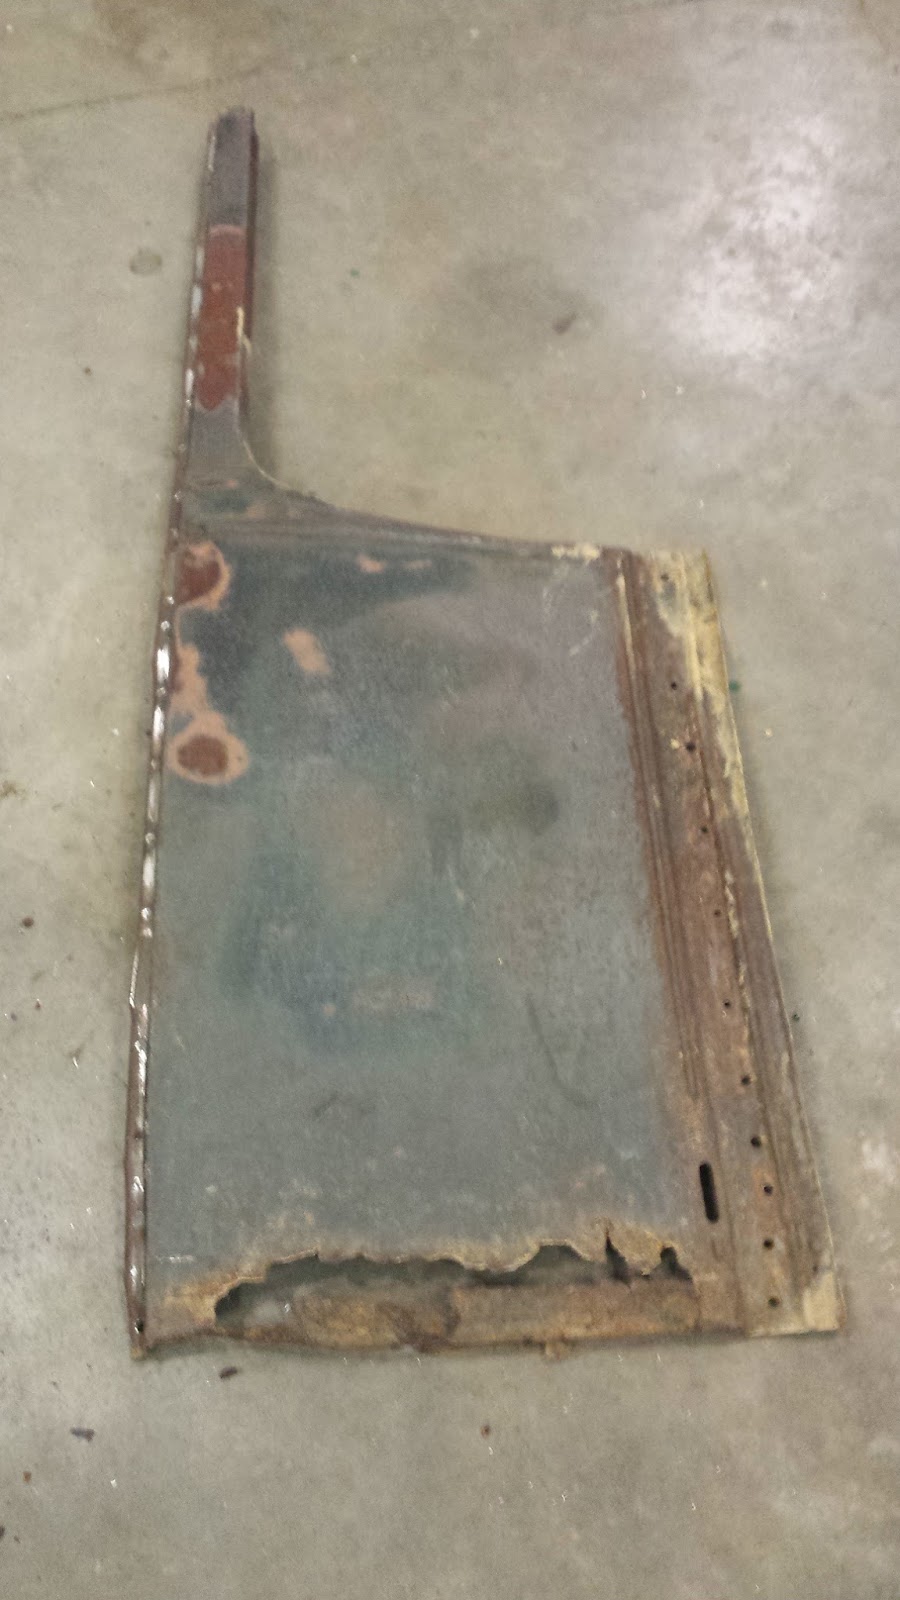
Since the passenger side lower cowl patch is done, it's time to move onto the driver side. I received several inquires on how I made the patch piece, so here you go....
The first step is to bend a 90 degree lip on the panel. This is the bottom and will attach underneath the sub rail structure via some spot welds...
Next, using some joggle dies on the Pulmax, I made the lower body line.
Now, this doesn't exactly make the lower body line a true copy of the original. It's relatively flat where as the original has a slight crown. I really need to just spend the time and make some dies...
But after spending some time lightly hammering the patch over a piece of round stock, it turns out fairly close...
When welding panels in, it's all about the fit...
The panel is going to warp...it happens. The weld shrinks when it cools and this distorts the metal. By hammering and dollying the weld, it can be stretched back out usually alleviating most of the distortion.
It is important to get the edges of the patch flush with the original panel so that it can be ground smooth. Don't spend too much time in one spot with the grinder. It is amazing how hot a sanding disc can get the metal and cause it to distort.
Friday, January 15, 2016
Monday, January 4, 2016
Model A truck updates....
In between projects, I have had some time to work on the Model A truck. Initially, I was focused on the T5 conversion but while I've been waiting on parts to get splined, I moved onto tackling some of the rust issues.
In order to mock everything up, I removed the original cross member. I knew that it was going to need modified, so I figured that I would be easier done out of the car. After I got the T5 installed, I stood back and noticed that the transmission hung down a bit. On a fully fendered car, this wouldn't be an issue but since I wanted to run fenderless, something had to be done..
My solution was to raise the back of the engine an 1" and the front by 1/2". This solved several issues. Not only did this raise the transmission up to an acceptable level, it helped maintain a better drive shaft angle since the truck is going to be lowered 4-5 inches. Also, it raised the pivot ball on the front wish bone which will compensate for the reversed eye front spring and maintain the proper caster.
The rear engine mounts were cut apart and an inch wide spacer added...
...then ground down...
In the front, a 1/2" spacer was added to the top. The original holes were then filled and redrilled 1/2" higher.
At this point, I was being held up waiting for parts. So, I turned my focus on fixing the rust. The firewall was actually in really nice shape except for the large hole cut for the heater.
As common with most A cowl sections in Ohio, the lower bead was rusted. I have found it much easier to drill the spot welds and remove the panel from the cowl. There really isn't enough room to get in behind and hammer the weld when it is left in place....though, I assume this is how most patch panels are welded in.
When I acquired the doors, the previous owner started a patch job. It certainty was savable, but the skin also looked like it was hit by several shotgun blasts. So, instead of trying to shrink all of the material, it was just easier to make my own skin and replace from the belt line down.
Slowly, it's starting to look like something....
In order to mock everything up, I removed the original cross member. I knew that it was going to need modified, so I figured that I would be easier done out of the car. After I got the T5 installed, I stood back and noticed that the transmission hung down a bit. On a fully fendered car, this wouldn't be an issue but since I wanted to run fenderless, something had to be done..
My solution was to raise the back of the engine an 1" and the front by 1/2". This solved several issues. Not only did this raise the transmission up to an acceptable level, it helped maintain a better drive shaft angle since the truck is going to be lowered 4-5 inches. Also, it raised the pivot ball on the front wish bone which will compensate for the reversed eye front spring and maintain the proper caster.
The rear engine mounts were cut apart and an inch wide spacer added...
...then ground down...
In the front, a 1/2" spacer was added to the top. The original holes were then filled and redrilled 1/2" higher.
Because the rear of the transmission essentially was pitched up several inches, the original cross member would have had to be severely cut. This would have dramatically impacted it's strength. So, the easiest thing to do was to build a new one loosely modeled off of an F1 cross member. If I would have left the engine mounts alone, there would have been plenty of material to modify the original cross member.
At this point, I was being held up waiting for parts. So, I turned my focus on fixing the rust. The firewall was actually in really nice shape except for the large hole cut for the heater.
As common with most A cowl sections in Ohio, the lower bead was rusted. I have found it much easier to drill the spot welds and remove the panel from the cowl. There really isn't enough room to get in behind and hammer the weld when it is left in place....though, I assume this is how most patch panels are welded in.
I have never been really fond of the aftermarket patch panels available for Model A's as the material always seem too soft. Having a Pullmax in the shop definitely makes things easier....
When I acquired the doors, the previous owner started a patch job. It certainty was savable, but the skin also looked like it was hit by several shotgun blasts. So, instead of trying to shrink all of the material, it was just easier to make my own skin and replace from the belt line down.
Slowly, it's starting to look like something....
'36 Firewall
As I start finally wrapping up the '36, one area that still needed attention was the firewall. Along the way, someone added a battery box to the passenger's side. I suspect it was the same sculptor that did the rust "repairs" before as there was copious amount of filler covering everything.
Other that the fact that it is an eyesore to begin with, the original installation didn't appear to be to terrible....
...of course, that changed as soon as I started grinding.
Oh how I love rivets and Bondo......
Tuesday, November 24, 2015
T5 to Ford '28-'48 Torque Tube Adapters....
I have been answering a ton of calls about the progress of our new T5 to torque Tube Adapters. Here are some progress pics to wet your appetite...
Initial mock up with '83-'88 4x4 S10 T5
Machining progress....
Drive line shortening....
Initial mock up with '83-'88 4x4 S10 T5
Machining progress....
Drive line shortening....
Model A to T5 adapters....
Well, they are finally here! Connect a "modern" T5 5 speed to your original 28-31 Model A engine.
This adapter uses the AA truck bell housing to adapt the '83 to '96 GM T5's to your banger engine. The adapter includes an integrated pedal shaft in the correct location so no modification have to be made to the original floor boards. It also has both T5 bolt patterns...the standard '83-early '93 GM "Muncie" pattern as well as the late '93 to '96 S-10 with the Ford pattern.
The kit includes the following:
- AA bellhousing adapter plate
- Pedal shaft
- Correct diameter pilot bearing
- Collar for the release bearing
- All hardware
Price: $425.00
If you are interested or have any questions, please feel free to give us a call or shoot us an email.
You might be wondering why we chose to use the AA bell housing over the stock passenger bell. Well, there as several reasons. First, the AA bell is about 2.5" shorter. This allows us not to have to use an extension on the input shaft of the T5. The T5 input shaft is actually quite a bit shorter than the original 3 speed transmission and doesn't even come close to reaching the flywheel with the passenger bell. With the AA bell housing, you have to trim 5/8" off of the pilot diameter and everything else lines up quite nicely. Also, since the overall package is shorter, the original cross member, if left in place, needs much less modifications. The AA bellhousing also lends itself very nicely to allowing for the use of both T5 bolt patterns. The '93-'96 T5 seem much easier to acquire at a reasonable cost.
Model A Truck ...From Parts........
For sometime, we have been working on building a Model A T5 adapter. It started with first developing a way to bolt the T5 to the original banger engine as cleanly and cost effectively as possible. Once that was figured out, the next logical step was to develop a way to retain the original torque tube rear end. Well, its fine to come up with these ideas on paper, but it's helpful to have a vehicle to actually test them on.
After some trading and dealings on the several internet forum boards, I ended up with a fairly complete running '31 Model A Chassis. The previous owner bought the car simply for the Coupe body and had no need for everything else. It appeared that someone along the way started to build a driver as the brakes where switched out for '40 hydraulic units and it had 16" wires on it. With a little bit of wiring, the engine fired right up and ran wonderfully. Needless to say, I was pretty amazed.
Initially, the chassis was simply going to be used for mock up and never had any plans of actually putting a body on it. But after falling into a fairly good deal on some truck body parts, plans change...
I found a local guy that had the rear section of a '30-'31 truck cab and thought that this would make a great shop truck for Vintage Metalworks. The cab and doors originally came from a Tudor Sedan that a guy in Pittsburgh was going to make an extended cab truck out of. Sure, all of the parts have a little rust on them, but it's nothing we can't take care of.
A little bit of interesting knowledge....I was under the impression that all Model A chassis where interchangeable. That, however, is it not true. there are quite a few subtle differences. I found this out when I went to try and install the cowl/sub rail section to the chassis. The front body mounts by the A-pillar where off. I knew that the chassis was a '31 but had know idea when the cowl was produced. Apparently, in September of 1930, Ford decided to to move the body mount back 2-3/8" to give more support to the A-pillar area. As you can see in the following picture, the front mounts had to be moved.
After some trading and dealings on the several internet forum boards, I ended up with a fairly complete running '31 Model A Chassis. The previous owner bought the car simply for the Coupe body and had no need for everything else. It appeared that someone along the way started to build a driver as the brakes where switched out for '40 hydraulic units and it had 16" wires on it. With a little bit of wiring, the engine fired right up and ran wonderfully. Needless to say, I was pretty amazed.
Initially, the chassis was simply going to be used for mock up and never had any plans of actually putting a body on it. But after falling into a fairly good deal on some truck body parts, plans change...
I found a local guy that had the rear section of a '30-'31 truck cab and thought that this would make a great shop truck for Vintage Metalworks. The cab and doors originally came from a Tudor Sedan that a guy in Pittsburgh was going to make an extended cab truck out of. Sure, all of the parts have a little rust on them, but it's nothing we can't take care of.
A little bit of interesting knowledge....I was under the impression that all Model A chassis where interchangeable. That, however, is it not true. there are quite a few subtle differences. I found this out when I went to try and install the cowl/sub rail section to the chassis. The front body mounts by the A-pillar where off. I knew that the chassis was a '31 but had know idea when the cowl was produced. Apparently, in September of 1930, Ford decided to to move the body mount back 2-3/8" to give more support to the A-pillar area. As you can see in the following picture, the front mounts had to be moved.
Wednesday, November 4, 2015
Haven't forgot about you.....
Don't worry, I'm still here. It's just been crazy busy without time to post anything.
There are several project that I am finishing up and will have some updates hopefully in the next day or two...
Subscribe to:
Posts (Atom)