Well, here is my latest trading deal...It's a genuine factory built Gordon Smith Compressor. As you can see, it uses original '28/'29 model parts combined with Gordon Smith parts to build a pull behind air compressor.
Unfortunately, the engine was stuck, but it's been sitting with penetrating fluid in the cylinders for a while. I did recently managed to get it to move a little though.
The guy that I got it from was one hell of an interesting fellow. Not to mention, he had some really neat stuff lying around...
I have no idea what I am going to do with it but it was too unique to pass up....
Wednesday, February 24, 2016
Pulleys...
While I am waiting for parts on my other projects, it's time to machine so pulleys for the Dodge 218 supercharge mount...
I find it amazingly satisfying to go from a concept, to a plastic 3D printed part to an actual usable part in a couple of days....
Monday, February 22, 2016
Some more progress on the '36 floor....
Well, finally both side floor boards are in and tacked. There was quite a bit of fitting and massaging but they are where they need to be.
I originally wanted to use the original tunnel but since this car has a 9" rear end with an offset pinion, that wasn't going to work out too well. Plus, the more I poked and prodded, the more questionable metal I found. So out it came....
Though you can't really tell in this photo, the rear of the tunnel is 2-1/2" wider than the front and is shifted toward the passenger side. This allows for plenty of clearance for the drive shaft.
Wednesday, February 10, 2016
Floors in a '36....
After 4 months of waiting, the floor pans finally showed up! I have to say that I am fairly satisfied with them.
So this is basically what I had to start with. When I received the car, this was all covered with galvanized sheetmetal and bondo. In fact, some of the bondo is still there in the picture filling the large gaping hole.
The best thing to do is cut it all out...
Once the rust was gone, I set the floors in to get an idea what needed to be done and as you can imagine, nothing fit well....
The rockers didn't even come close. How can companies sell this stuff?
But after a couple hours of fitting, grinding, cutting and massaging, they are starting to lay in fairly decently.
Time for the passenger side....
So this is basically what I had to start with. When I received the car, this was all covered with galvanized sheetmetal and bondo. In fact, some of the bondo is still there in the picture filling the large gaping hole.
The best thing to do is cut it all out...
Once the rust was gone, I set the floors in to get an idea what needed to be done and as you can imagine, nothing fit well....
The rockers didn't even come close. How can companies sell this stuff?
But after a couple hours of fitting, grinding, cutting and massaging, they are starting to lay in fairly decently.
Time for the passenger side....
Graham Superchager Mount update...
Found some time to mess with the long ongoing project of mounting a Graham supercharge on a Dodge 218/230 engine.
The first one that I did years ago, I mounted the alternator on the other side off of the front mount. Can't say that I really cared for that and figured since then that there has to be a better way. So, this one, I wanted to tuck it in under the supercharger itself.
Unfortunately, I am going to have to run two belts which means that I have to machine a couple of pulleys....So, that's the next step.
The first one that I did years ago, I mounted the alternator on the other side off of the front mount. Can't say that I really cared for that and figured since then that there has to be a better way. So, this one, I wanted to tuck it in under the supercharger itself.
Unfortunately, I am going to have to run two belts which means that I have to machine a couple of pulleys....So, that's the next step.
Wednesday, February 3, 2016
Model A Truck....more rust repair....
This time, it's the gas tank....
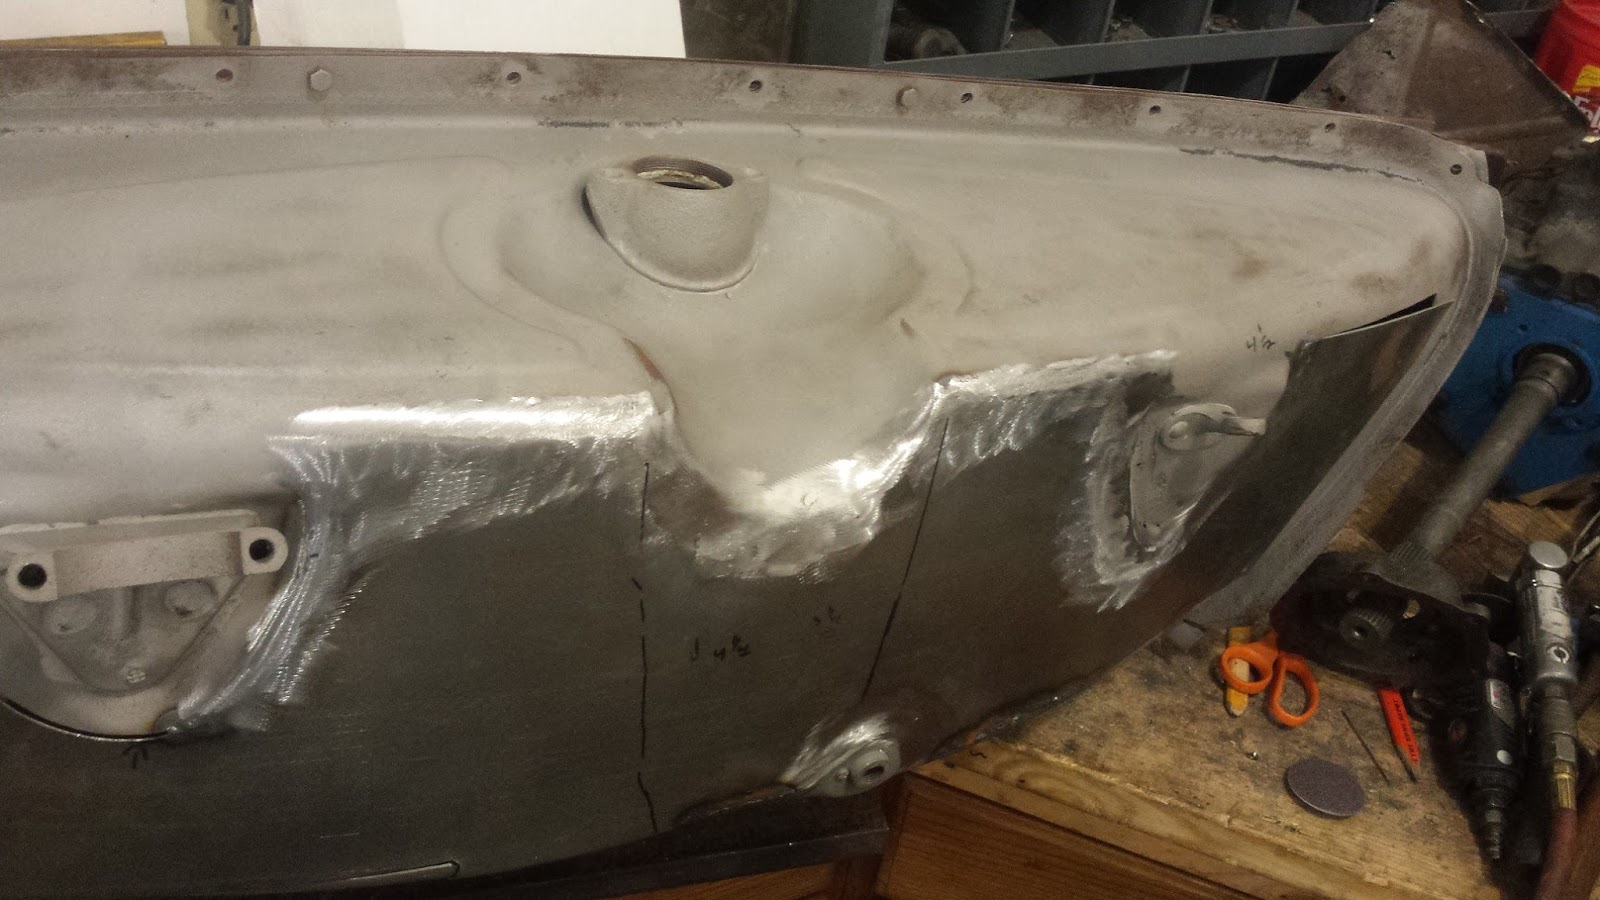
The entire bottom was riddled with pinholes so I decided that it would be easier to replace everything in one large patch instead of a bunch of smaller ones. Plus, this allows me to sand blast the inside before welding it up. Like all the gas tanks I build, the plan is to have the inside coated . It makes the process so much easier when it's all clean.
After I decided where I needed to cut, the patch panel was cut out. The cleco's were used to hold the panel down while a line was marked around on the gas tank. In theory, if I cut exactly on the line, the patch should fit perfectly...
Once all four of the baffles were made, they were sandblasted and spot welded together.
And now comes the long task of fitting and welding. Since there is no way to hammer the weld back out, patience is key in not causing excessive warping. Weld a little bit, let it cool, repeat until it's done...It's as simple as that.
The entire bottom was riddled with pinholes so I decided that it would be easier to replace everything in one large patch instead of a bunch of smaller ones. Plus, this allows me to sand blast the inside before welding it up. Like all the gas tanks I build, the plan is to have the inside coated . It makes the process so much easier when it's all clean.
After I decided where I needed to cut, the patch panel was cut out. The cleco's were used to hold the panel down while a line was marked around on the gas tank. In theory, if I cut exactly on the line, the patch should fit perfectly...
Once the bottom was off, I could asses the condition of the baffles. Unfortunately, they were pretty rusty with about the lower 1" completely gone. So, time to make some new ones. With some scrap pieces of wood lying around, I cut two identical templates. A piece of 18ga was cut roughly to the desired shape and then sandwiched between the wood. The edges were then hammered down.
Once all four of the baffles were made, they were sandblasted and spot welded together.
And now comes the long task of fitting and welding. Since there is no way to hammer the weld back out, patience is key in not causing excessive warping. Weld a little bit, let it cool, repeat until it's done...It's as simple as that.
Once the wire loom is welded back on, I'll give it a final sandblasting and take it to get the inside coated.
Friday, January 15, 2016
Model A cowl patch...
Since the passenger side lower cowl patch is done, it's time to move onto the driver side. I received several inquires on how I made the patch piece, so here you go....
The first step is to bend a 90 degree lip on the panel. This is the bottom and will attach underneath the sub rail structure via some spot welds...
Next, using some joggle dies on the Pulmax, I made the lower body line.
Now, this doesn't exactly make the lower body line a true copy of the original. It's relatively flat where as the original has a slight crown. I really need to just spend the time and make some dies...
But after spending some time lightly hammering the patch over a piece of round stock, it turns out fairly close...
When welding panels in, it's all about the fit...
The panel is going to warp...it happens. The weld shrinks when it cools and this distorts the metal. By hammering and dollying the weld, it can be stretched back out usually alleviating most of the distortion.
It is important to get the edges of the patch flush with the original panel so that it can be ground smooth. Don't spend too much time in one spot with the grinder. It is amazing how hot a sanding disc can get the metal and cause it to distort.
The first step is to bend a 90 degree lip on the panel. This is the bottom and will attach underneath the sub rail structure via some spot welds...
Next, using some joggle dies on the Pulmax, I made the lower body line.
Now, this doesn't exactly make the lower body line a true copy of the original. It's relatively flat where as the original has a slight crown. I really need to just spend the time and make some dies...
But after spending some time lightly hammering the patch over a piece of round stock, it turns out fairly close...
When welding panels in, it's all about the fit...
The panel is going to warp...it happens. The weld shrinks when it cools and this distorts the metal. By hammering and dollying the weld, it can be stretched back out usually alleviating most of the distortion.
It is important to get the edges of the patch flush with the original panel so that it can be ground smooth. Don't spend too much time in one spot with the grinder. It is amazing how hot a sanding disc can get the metal and cause it to distort.
Subscribe to:
Posts (Atom)