

Wednesday, July 30, 2014
Thursday, July 17, 2014
It Runs!!!.....Again......
We were finally able to pour gas back into the truck and start it up for the first time since moving the gas tank and beginning the rewire. I am happy to say that it started right up without issue.

There are still several minor items that needed to be finished up before its done. One of those was the switch panel. I just couldn't bring myself to drill and mount these four switches in the original dash board, there really was no good place for them that didn't look like an afterthought. So, I figured our best bet was to build a panel that bolted underneath. I started with a flat piece of 20ga and formed the knob reliefs by bolting a socket to the back side and hammering around it on the front. After a bit of dolly work, I welded sides on to give it a bit more rigidity and also hide the wires.


I used the 3D printer to make a label panel that I epoxied on the front....

...then gave it a coat of paint and highlighted the lettering....
 ...then installed it.
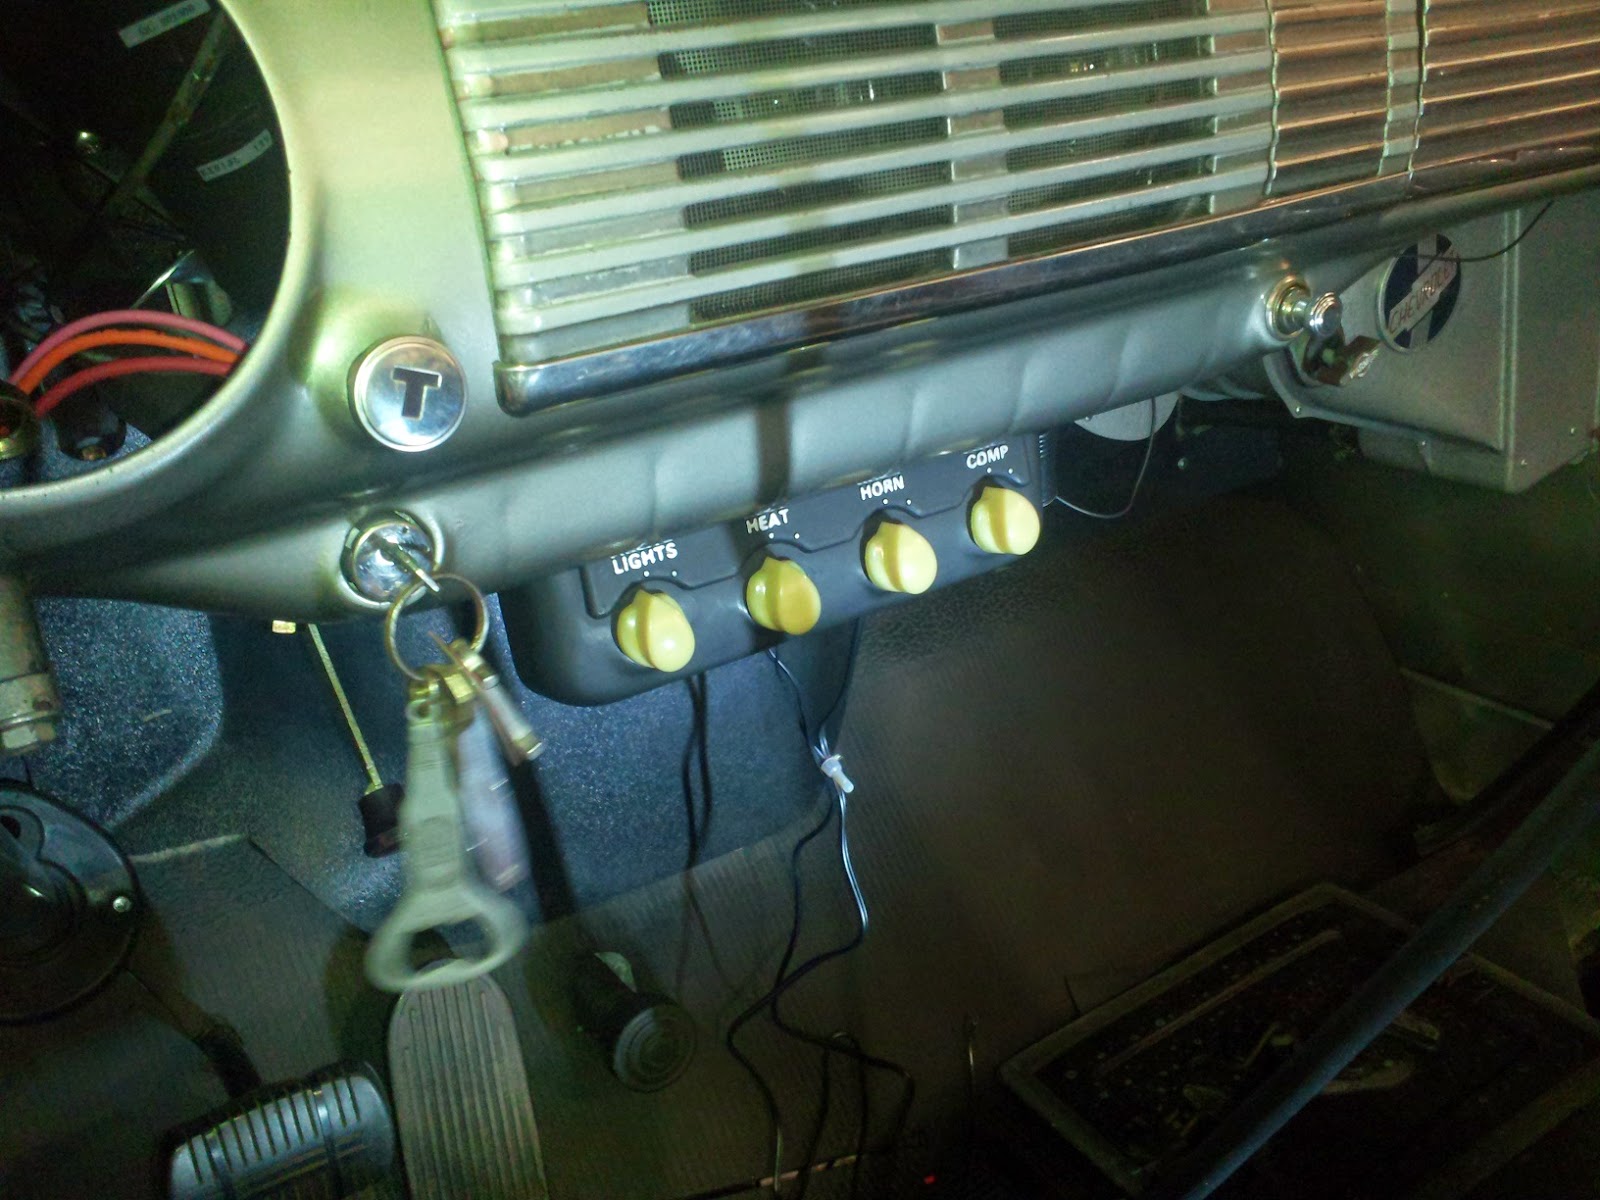
You might be wondering what the switches do? The first two, "LIGHT" and "HEAT" are exactly what you might think...fog lights and the heater blower motor. The next two are for the the air horn that the customer had us install...which I might add is VERY loud! I wired the horns so that you can switch between the stock one and the air horn but use the same stock horn button on the steering wheel. The "COMP" switch is to turn on the air compressor.

There are still several minor items that needed to be finished up before its done. One of those was the switch panel. I just couldn't bring myself to drill and mount these four switches in the original dash board, there really was no good place for them that didn't look like an afterthought. So, I figured our best bet was to build a panel that bolted underneath. I started with a flat piece of 20ga and formed the knob reliefs by bolting a socket to the back side and hammering around it on the front. After a bit of dolly work, I welded sides on to give it a bit more rigidity and also hide the wires.
I used the 3D printer to make a label panel that I epoxied on the front....
...then gave it a coat of paint and highlighted the lettering....
You might be wondering what the switches do? The first two, "LIGHT" and "HEAT" are exactly what you might think...fog lights and the heater blower motor. The next two are for the the air horn that the customer had us install...which I might add is VERY loud! I wired the horns so that you can switch between the stock one and the air horn but use the same stock horn button on the steering wheel. The "COMP" switch is to turn on the air compressor.
Thursday, July 10, 2014
Getting closer...
I'm not trying to complain, but the wiring on this truck has fought me the entire way. It's not really anybody's fault in particular, its just one thing after another.
This time, it was the turn signal switch. I couldn't figure out why the brake lights were not functioning reliably. They would work fine and then mysteriously stop working. I would check for power and then they would start working again. Finally, after a bit of diagnosing, it "turned" out that the turn signal switch was the culprit. Since the turn signals lights and the brake lights use the same bulbs, the brake light circuit runs through the turn signal switch and is interrupted by the appropriate turn signal when actuated. So, I installed a new switch only to find out that the turn signal indicators would not function correctly. This was because the aftermarket switches need a 3 prong flasher instead of the standard 2 prong flasher. The 3rd prong is there strictly for the indicators. Fortunately, the fuse panel had provisions in the flasher socket for the 3rd prong so after a bit of disassemble and running an extra wire, voila, it worked correctly.

As it stands now, the radio, heater, horn and dome light still have to be hooked up and then everything reassembled. All of the other wiring is done and ready to go.

This time, it was the turn signal switch. I couldn't figure out why the brake lights were not functioning reliably. They would work fine and then mysteriously stop working. I would check for power and then they would start working again. Finally, after a bit of diagnosing, it "turned" out that the turn signal switch was the culprit. Since the turn signals lights and the brake lights use the same bulbs, the brake light circuit runs through the turn signal switch and is interrupted by the appropriate turn signal when actuated. So, I installed a new switch only to find out that the turn signal indicators would not function correctly. This was because the aftermarket switches need a 3 prong flasher instead of the standard 2 prong flasher. The 3rd prong is there strictly for the indicators. Fortunately, the fuse panel had provisions in the flasher socket for the 3rd prong so after a bit of disassemble and running an extra wire, voila, it worked correctly.
As it stands now, the radio, heater, horn and dome light still have to be hooked up and then everything reassembled. All of the other wiring is done and ready to go.
Monday, June 30, 2014
New project for my father...
Since my dad is getting ready to retire for the 4th time, he needed a new project to occupy his time...


Illumination....
I was able to find some time this weekend to make a little progress on the Chevy truck re-wire. Essentially, the front half of the truck is done. It cranks, has spark and all of the front lights work. As typical with GM's, the front parking light are wired to turnoff when the headlights are on. The fog lights are on their own switch but are wired in conjunction with the tail lights. So, when the headlight switch is completely off, the fog lights will be off as well. However, they will be able to be turned on with or with out the headlights.


Thursday, June 26, 2014
Rolling Deep On some 15's.....
Since the Volvo is getting once step closer to it's 2JZ swap, I needed to temporary replacement for it's daily driver duties. This beauty found me and for the price, I couldn't pass it up...

1994 Cadillac Fleetwood Brougham...
Oh GM, you had such a good styling department through the 90's....
1994 Cadillac Fleetwood Brougham...
Oh GM, you had such a good styling department through the 90's....
Tuesday, June 24, 2014
Wiring progress...
I have never been a fan of having wires pass through a grommet on the fire wall. Sure, the grommet is necessary to prevent any type of chaffing, but it just looks like hell. An idea that I originally saw on a stock '40 Ford was to hide all of this behind a cover plate. Unfortunately, I didn't have a stock '40 ford cover plate, so I just made one...or at least a variation of one...


After some hammering, trimming, more hammering, a bunch of finish planishing and finally some more trimming, the cover fit fairly decent.

I really like using this cloth wire loom. It has great abrasion resistance and a fairly high temperature rating. Plus, it looks attractive and fits with era of the vehicle. The majority of the time associated with wiring is actually taken up by sorting out the loom. Sure, it's definitely tedious work. However, once its done, it'll last for a very long time and provide excellent protection to the wires.


There are still several clamps to install but it's nice when a harness fits well enough to hold itself in place...

After some hammering, trimming, more hammering, a bunch of finish planishing and finally some more trimming, the cover fit fairly decent.
I really like using this cloth wire loom. It has great abrasion resistance and a fairly high temperature rating. Plus, it looks attractive and fits with era of the vehicle. The majority of the time associated with wiring is actually taken up by sorting out the loom. Sure, it's definitely tedious work. However, once its done, it'll last for a very long time and provide excellent protection to the wires.
There are still several clamps to install but it's nice when a harness fits well enough to hold itself in place...
Subscribe to:
Posts (Atom)